
— Photoshop Tutorial: Creating an Image Reflection —
and/or Fading Out an Image
Reflecting and fading an image is really easy. This is also a great way to demonstrate a very powerful Photoshop feature know as a "mask," which is found in the layers menu. Masks allow us to "target" changes to an image so they are applied only to certain areas within an image.
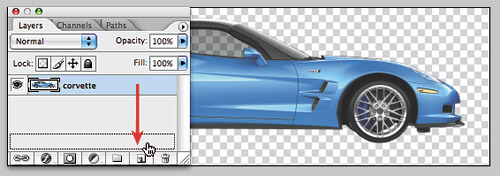
To simplify this Photoshop tutorial, we start with a straight image on a clear background and open the layers pallet (select WINDOW > LAYERS if it is not already visible). Make a copy of the layer — the easiest way is drag it to the "create a new layer" icon.

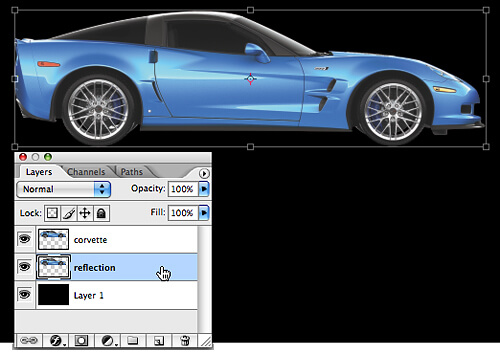
Drag the layer copy to the bottom so it is the last item in the layers pallet. You may want to rename it "reflection." Now make the canvas size large enough to hold the reflected image. You may wish to make an additional layer with a background color at this point. I chose black as it will show up well for this Photoshop tutorial. Make the background color the LAST layer in the layers pallet or it will cover things up.
With the reflection layer selected, choose EDIT > TRANSFORM or the keyboard shortcut: Ctrl + T, or Command + T on a Mac, to select the transform tool.
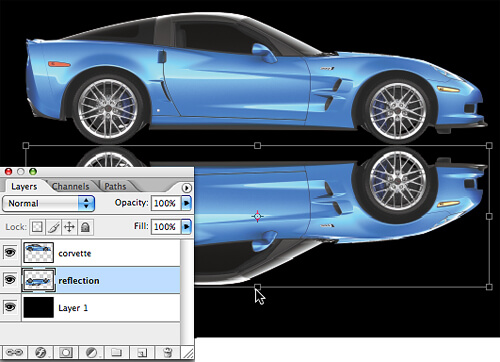
Now drag the top handle downward until you have an upside down image below the original. The depth of the transformed image doesn't have to be the same as the original, as various depths will simulate different angles of the reflection to the angle of the light source of the reflection.
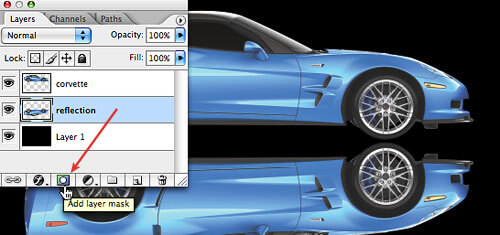
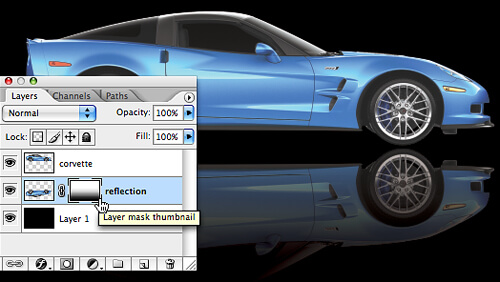
With the reflection layer selected, click on the "add layer mask" icon in the layers pallet By default it will be a white background. When using a mask on various effects in Photoshop, white reveals the effect and black hides the effect. In this case we are going to "hide" part of our reflection using the gradient tool.
Select the Gradient Tool in the tools menu, or use the keyboard shortcut "g." Make sure that the default colors (black and white) are selected in the colors pallet. With the layer mask thumbnail selected, draw a gradient from the bottom of the original image to the bottom of the reflected image. Drawing a shorter (or longer) gradient will affect how gradual or drastic the fade is. At this point you may want to reduce the overall opacity of the layer, apply a slight Gaussian blur, or change the angle of the reflection to simulate which direction the light source is located.
Need Graphic Design Help?

If your company doesn't have a graphic designer, TSOQ Printing has professional graphic designers on staff that can help you!
If you have any questions about our services, need a price quote, or want to speak with an expert for some questions about printing or graphic design, please don't hesitate to contact us.
We will be happy to assist you!
Our printing company is available 24/7 by phone at 718-523-7246, Live Chat or email.